IoC全称为Inversion of Control,即 “控制反转”。在Spring框架里,实现IOC,是通过IOC容器实现的,由IOC容器负责创建和获取依赖对象,对象只是被动地接受依赖对象。
1. 创建一个maven工程
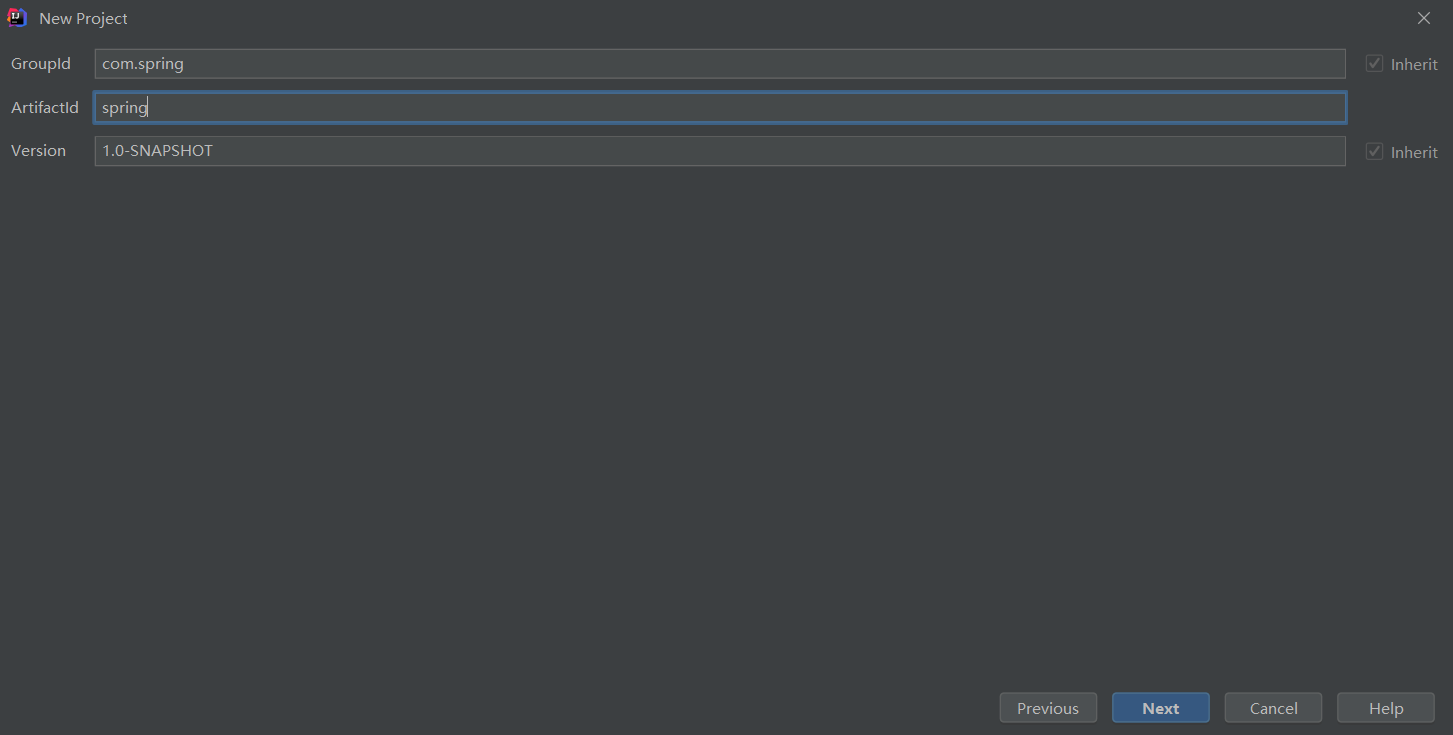
2. 在pom.xml中导入spring依赖
1
2
3
4
5
6
7
8
9
10
11
12
13
14
15
16
17
18
19
20
| <?xml version="1.0" encoding="UTF-8"?>
<project xmlns="http://maven.apache.org/POM/4.0.0"
xmlns:xsi="http://www.w3.org/2001/XMLSchema-instance"
xsi:schemaLocation="http://maven.apache.org/POM/4.0.0 http://maven.apache.org/xsd/maven-4.0.0.xsd">
<modelVersion>4.0.0</modelVersion>
<groupId>com.spring</groupId>
<artifactId>spring</artifactId>
<version>1.0-SNAPSHOT</version>
<packaging>jar</packaging>
<dependencies>
<dependency>
<groupId>org.springframework</groupId>
<artifactId>spring-context</artifactId>
<version>5.0.2.RELEASE</version>
</dependency>
</dependencies>
</project>
|
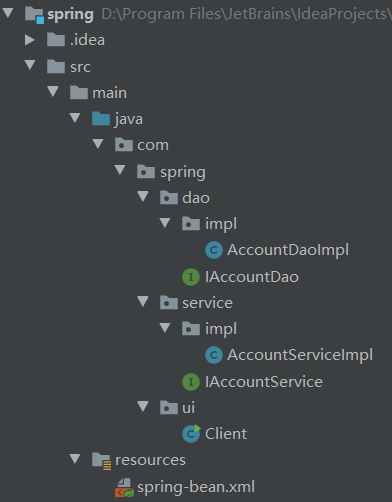
3. 创建dao层接口和实现类
在com.spring.dao中创建一个IAccountDao接口,在com.spring.dao.impl中创建IAccountDao接口的实现类AccountDaoImpl
1
2
3
4
5
| package com.spring.dao;
public interface IAccountDao {
void saveAccount();
}
|
1
2
3
4
5
6
7
8
9
| package com.spring.dao.impl;
import com.spring.dao.IAccountDao;
public class AccountDaoImpl implements IAccountDao {
public void saveAccount() {
System.out.println("保存成功");
}
}
|
4. 创建Service层接口和实现类
在com.spring.service中创建一个IAccountService接口,在com.spring.service.impl中创建IAccountService接口的实现类AccountServiceImpl
1
2
3
4
5
| package com.spring.service;
public interface IAccountService {
void saveAccount();
}
|
1
2
3
4
5
6
7
8
9
10
11
12
13
14
15
| package com.spring.service.impl;
import com.spring.dao.IAccountDao;
import com.spring.dao.impl.AccountDaoImpl;
import com.spring.service.IAccountService;
public class AccountServiceImpl implements IAccountService {
private IAccountDao accountDao = new AccountDaoImpl();
public void saveAccount(){
accountDao.saveAccount();
}
}
|
5. 在resouces目录下创建spring配置文件
导入beans约束后,在beans标签中添加两个bean标签,id是获取时的唯一标志,class是反射要创建对象的全限定类名。
这里我们需要spring帮我们创建AccountServiceImpl和AccountDaoImpl两个类
1
2
3
4
5
6
7
8
9
| <?xml version="1.0" encoding="UTF-8"?>
<beans xmlns="http://www.springframework.org/schema/beans"
xmlns:xsi="http://www.w3.org/2001/XMLSchema-instance"
xsi:schemaLocation="http://www.springframework.org/schema/beans
http://www.springframework.org/schema/beans/spring-beans-3.1.xsd">
<bean id="accountService" class="com.spring.service.impl.AccountServiceImpl"></bean>
<bean id="accountDao" class="com.spring.dao.impl.AccountDaoImpl"></bean>
</beans>
|
6. 创建Client类
获取spring的Ioc核心容器,并创建id获取对象
获取对象有两种写法,Client类中as拿到的是Object类型的对象,要自己强转;adao中除了id,还传入了IAccountDao的字节码,通过字节码自动强转
ApplicationContext的三个常用实现类:
ClassPathXmlApplicationContext:它可以加载类路径下的配置文件,要求配置文件必须在类路径下。不在的话加载不了。
FileSystemXmlApplicationContext:它可以加载磁盘任意路径下的配置文件(必须有访问权限)
AnnotationConfigApplicationContext:用于读取注解创建容器
1
2
3
4
5
6
7
8
9
10
11
12
13
14
15
16
17
18
19
20
21
22
23
| package com.spring.ui;
import com.spring.dao.IAccountDao;
import com.spring.service.IAccountService;
import org.springframework.context.ApplicationContext;
import org.springframework.context.support.ClassPathXmlApplicationContext;
public class Client {
public static void main(String[] args) {
ApplicationContext ac = new ClassPathXmlApplicationContext("spring-bean.xml");
IAccountService as = (IAccountService) ac.getBean("accountService");
IAccountDao adao = ac.getBean("accountDao",IAccountDao.class);
System.out.println(as);
System.out.println(adao);
}
}
|
输出结果

工程结构