1. 创建一个maven项目
1.1 导入jar包
1
2
3
4
5
6
7
8
9
10
11
12
13
14
15
16
17
18
19
20
21
22
23
24
25
26
27
| <?xml version="1.0" encoding="UTF-8"?>
<project xmlns="http://maven.apache.org/POM/4.0.0"
xmlns:xsi="http://www.w3.org/2001/XMLSchema-instance"
xsi:schemaLocation="http://maven.apache.org/POM/4.0.0 http://maven.apache.org/xsd/maven-4.0.0.xsd">
<modelVersion>4.0.0</modelVersion>
<groupId>com.spring</groupId>
<artifactId>springAop</artifactId>
<version>1.0-SNAPSHOT</version>
<packaging>jar</packaging>
<dependencies>
<dependency>
<groupId>org.springframework</groupId>
<artifactId>spring-context</artifactId>
<version>5.0.2.RELEASE</version>
</dependency>
<dependency>
<groupId>org.aspectj</groupId>
<artifactId>aspectjweaver</artifactId>
<version>1.8.7</version>
</dependency>
</dependencies>
</project>
|
1.2 创建模拟操作账户的接口和实现类
1
2
3
4
5
6
7
8
9
10
11
12
13
14
15
16
17
18
19
20
21
22
23
| package com.springAoc.service;
public interface IAccountService {
void saveAccount();
void updateAccount(int i);
int deleteAccount();
}
|
1
2
3
4
5
6
7
8
9
10
11
12
13
14
15
16
17
18
| package com.springAoc.service.impl;
import com.springAoc.service.IAccountService;
public class AccountServiceImpl implements IAccountService {
public void saveAccount() {
System.out.println("执行了保存操作");
}
public void updateAccount(int i) {
System.out.println("执行了更新操作"+i);
}
public int deleteAccount() {
System.out.println("执行了删除操作");
return 0;
}
}
|
3. 创建一个公共日志类,用于AOP的前置增强
1
2
3
4
5
6
7
8
9
10
11
12
13
14
| package com.springAoc.utils;
public class Logger {
public void printLog(){
System.out.println("Logger类中的printLog方法开始记录日志。。。");
}
}
|
4. 创建bean配置文件
在配置文件中导入aop的约束,配置AccountServiceImpl和日志类Logger的bean,放入spring容器。使用<aop:config>标签配置切面
1
2
3
4
5
6
7
8
9
10
11
12
13
14
15
16
17
18
19
20
21
22
23
24
25
26
27
28
29
30
31
32
33
34
35
36
37
38
39
40
41
| <?xml version="1.0" encoding="UTF-8"?>
<beans xmlns="http://www.springframework.org/schema/beans"
xmlns:xsi="http://www.w3.org/2001/XMLSchema-instance"
xmlns:aop="http://www.springframework.org/schema/aop"
xsi:schemaLocation="http://www.springframework.org/schema/beans
https://www.springframework.org/schema/beans/spring-beans.xsd
http://www.springframework.org/schema/aop
https://www.springframework.org/schema/aop/spring-aop.xsd">
<bean id="accountService" class="com.springAop.service.impl.AccountServiceImpl"></bean>
<bean id="logger" class="com.springAop.utils.Logger"></bean>
<aop:config>
<aop:aspect id="logAdvice" ref="logger">
<aop:before method="printLog" pointcut="execution(public void com.springAop.service.impl.AccountServiceImpl.saveAccount())"></aop:before>
</aop:aspect>
</aop:config>
</beans>
|
5. 新建一个测试类
1
2
3
4
5
6
7
8
9
10
11
12
13
14
15
16
| package com.springAop.test;
import com.springAop.service.IAccountService;
import org.springframework.context.ApplicationContext;
import org.springframework.context.support.ClassPathXmlApplicationContext;
public class aopTest {
public static void main(String[] args) {
ApplicationContext ac = new ClassPathXmlApplicationContext("bean.xml");
IAccountService as = (IAccountService)ac.getBean("accountService");
as.saveAccount();
}
}
|
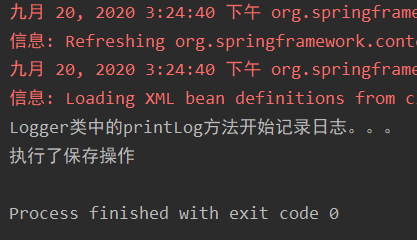
6. 运行结果
8. 配置四个增强(前置、后置、异常、最终)
8.1 修改日志Logger类
1
2
3
4
5
6
7
8
9
10
11
12
13
14
15
16
17
18
19
20
21
22
23
24
25
26
27
28
29
30
31
32
33
34
35
36
| package com.springAop.utils;
public class Logger {
public void beforePrintLog(){
System.out.println("前置增强————Logger类中的beforePrintLog方法开始记录日志。。。");
}
public void afterReturnPrintLog(){
System.out.println("后置增强————Logger类中的afterReturnPrintLog方法开始记录日志。。。");
}
public void afterThrowingPrintLog(){
System.out.println("异常增强————Logger类中的afterThrowingPrintLog方法开始记录日志。。。");
}
public void afterPrintLog(){
System.out.println("最终增强————Logger类中的afterPrintLog方法开始记录日志。。。");
}
}
|
8.2 修改配置文件
1
2
3
4
5
6
7
8
9
10
11
12
13
14
15
16
17
18
19
20
21
22
23
24
25
26
27
28
29
30
31
| <?xml version="1.0" encoding="UTF-8"?>
<beans xmlns="http://www.springframework.org/schema/beans"
xmlns:xsi="http://www.w3.org/2001/XMLSchema-instance"
xmlns:aop="http://www.springframework.org/schema/aop"
xsi:schemaLocation="http://www.springframework.org/schema/beans
https://www.springframework.org/schema/beans/spring-beans.xsd
http://www.springframework.org/schema/aop
https://www.springframework.org/schema/aop/spring-aop.xsd">
<bean id="accountService" class="com.springAop.service.impl.AccountServiceImpl"></bean>
<bean id="logger" class="com.springAop.utils.Logger"></bean>
<aop:config>
<aop:aspect id="logAdvice" ref="logger">
<aop:before method="beforePrintLog" pointcut="execution(* com.springAop.service.impl.*.*(..))"></aop:before>
<aop:after-returning method="afterReturnPrintLog" pointcut="execution(* com.springAop.service.impl.AccountServiceImpl.*(..))"></aop:after-returning>
<aop:after-throwing method="afterThrowingPrintLog" pointcut="execution(* com.springAop.service.impl.AccountServiceImpl.*(..))"></aop:after-throwing>
<aop:after method="afterPrintLog" pointcut="execution(* com.springAop.service.impl.AccountServiceImpl.*(..))"></aop:after>
</aop:aspect>
</aop:config>
</beans>
|
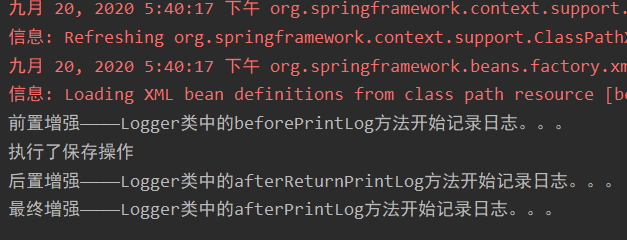
8.3 运行结果
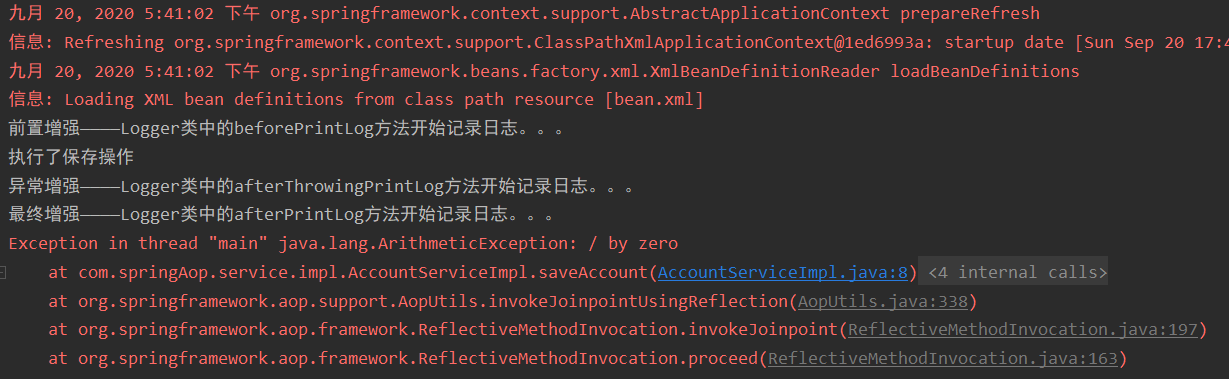
8.4 异常运行结果
在实现类中加入一个异常
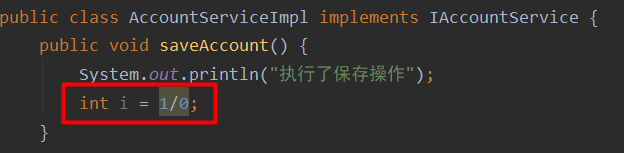
此时就没有后置增强,只有异常增强
9. 切入点表达式的写法
关键字:execution(表达式)
表达式:访问修饰符 返回值 包名.类名.方法名(参数列表)
示例
public void com.springAop.service.impl.AccountServiceImpl.saveAccount()
访问修饰符可以省略
void com.springAop.service.impl.AccountServiceImpl.saveAccount()
返回值可以使用通配符,表示任意返回值
* com.springAop.service.impl.AccountServiceImpl.saveAccount()
包名可以使用通配符,表示任意包,有几级包就要写几个*.
* *.*.*.*.AccountServiceImpl.saveAccount()
包名可以使用. .表示当前包及其子包
* *. .AccountServiceImpl.saveAccount()
类名和方法名都可以用使用*来实现通配
* *. .*.*()
方法参数列表
可以直接写数据类型:
———— 基本类型直接写名称: int
———— 引用类型写包名.类名的方式:java.lang.String
可以使用通配符表示任意类型,但是必须有参数
可以使用. .表示有无参数均可,有参数可以是任意类型
全通配写法
* *. .*.*(. .)
实际开发中切入点表达式的通常写法
切到业务层实现类下的所有方法
* com.springAop.service.impl.*.*(. .)
10. 切入点表达式简化
当我们给同一个方法配置多个增强的时候,会出现重复的切入点表达式。此时可以使用aop增强标签中的pointcut-ref属性,简化切入点表达式

10.1 配置切入点表达式,id属性用于指定表达式的唯一标识,expression属性用于指定表达式内容
10.2 把aop增强标签中的pointcut属性换成point-ref属性
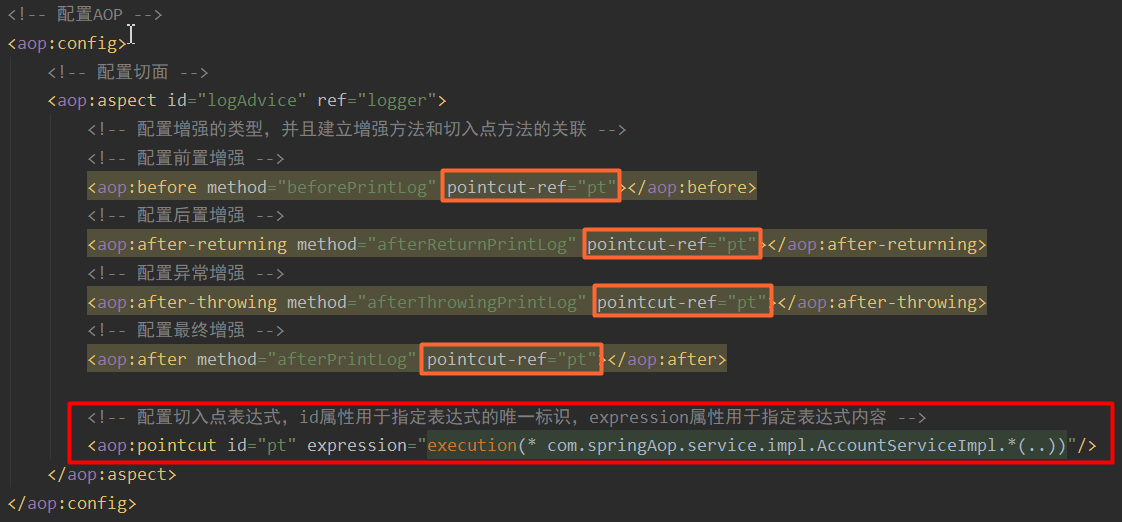
<aop:pointcut>标签写在<aop:aspect>标签内只能当前切面使用,它还可以写在<aop:aspect>标签外,此时就变成了所有切面可用,但是要写在<aop:aspect>标签的前面,这是spring规定的标签顺序